Connect your Apartment Life Office 365 calendar with the meetings tool to set up a booking page for prospects to book time with you. If you have an event on your connected calendar, the meetings tool will show that you're busy during the event time. Once your calendar is connected, you can create meetings links to share with your prospects and contacts so they can book time with you.
Connect Your Calendar
- In your HubSpot account, click the settings icon settings in the main navigation bar.
- In the left sidebar menu, navigate to Sales > Meetings.
- Click Connect your Office 365 calendar.
- In the dialog box, click Accept and connect to Office 365 to give the meetings tool access to your calendar.

You'll be redirected to the meetings dashboard, where you can set up an individual meetings link.
With this calendar sync, meetings created directly on a contact record in the CRM will send actual calendar event invitations to the contact. Without your calendar connected, it will create a meeting engagement on the record with no calendar event invitation sent.
Customize Your Connected Calendar's Settings
After connecting your calendar, users with an assigned Sales Hub or Service Hub paid seat can customize their default meetings link URL All users can add additional calendars in their settings.
Edit your meetings URL and default meetings link
You can change your meetings URL or select a new default meeting link.
- In your HubSpot account, click the settings icon settings in the main navigation bar.
- In the left sidebar menu, navigate to Sales > Meetings.

- On the Preferences tab, customize your meetings URL:
- In the Meetings URL field, edit the URL. Changes to your meetings URL will apply to all new links going forward, but will not change existing meetings links.
Connect additional calendars
You can connect additional calendars to your integrated calendar. When a contact books a meeting with you, HubSpot will check the availability on each calendar and block off times that are busy.
- In your HubSpot account, click the settings icon settings in the main navigation bar.
- In the left sidebar menu, navigate to Sales > Meetings.
- Click the Calendar Integration tab.
- Click the Use more calendars dropdown menu and select any additional calendars.
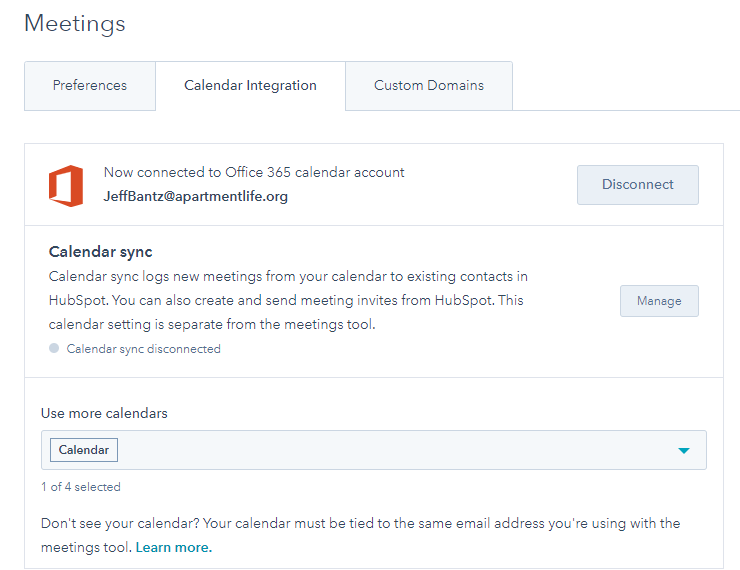
- To remove an additional calendar, click X next to the calendar name.
- Click Save.
You can only add calendars that you own or that your email address has access to in your connected Gmail or Office 365 account. Learn how to set up new Google calendars and new Office 365 calendars. When a prospect books a meeting with you, the meeting event will only appear on your personal default calendar, not your other integrated calendars.
Create and Share Meeting Links
Once you have connected your calendar and customized your meetings tool preferences, you can create meetings links to share with your contacts so they can easily book time with you. Booked meetings will sync with your Apartment Life Office 365 Calendar so your appointments will always be up-to-date.
Create meetings links
- In your HubSpot account, navigate to Sales > Meetings.
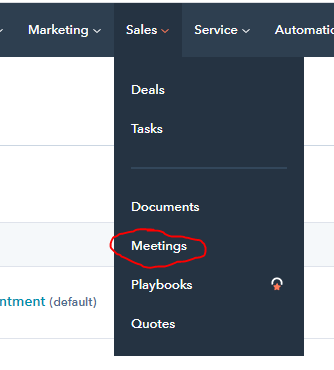
- To create a meeting link, in the upper right, click Create meeting link, then select Personal.

- Continue setting up your meeting link following the steps below.
Customize your meetings link details
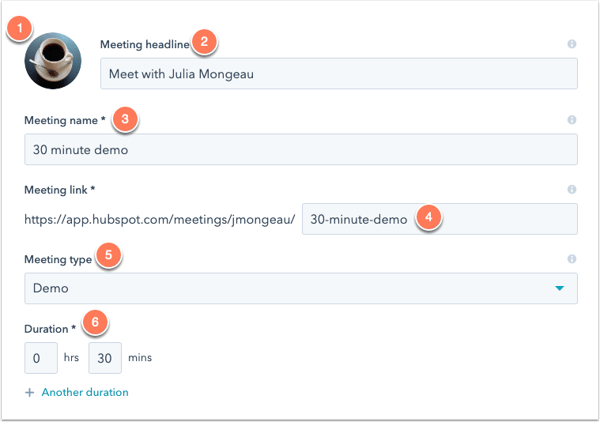
On the Details page, edit the meetings link's basic information.
- Meeting photo: this photo will display at the top of your meetings link page. Hover over the photo and click Change photo to edit it.
- Meeting headline: this headline will display next to the meeting photo at the top of your meetings link page.
- Meeting name: the internal name that appears in your meetings dashboard and when you insert the meetings link into an email.
- Meeting link: the link that prospects use to book this meeting. The link can be edited by paid Sales Hub or Service Hub users only. This value is not editable after creation. In order to have a link at a new URL, you will need to create a new link.
- Meeting type (Sales Hub Professional or Enterprise or Service Hub Professional or Enterprise only): choose a meeting type from the dropdown menu.
- Duration: the length of time visitors can book you for when clicking this meetings link. Click + Add duration to add more options.
- When you're done editing your meeting details, click Next.
Customize your meeting configuration
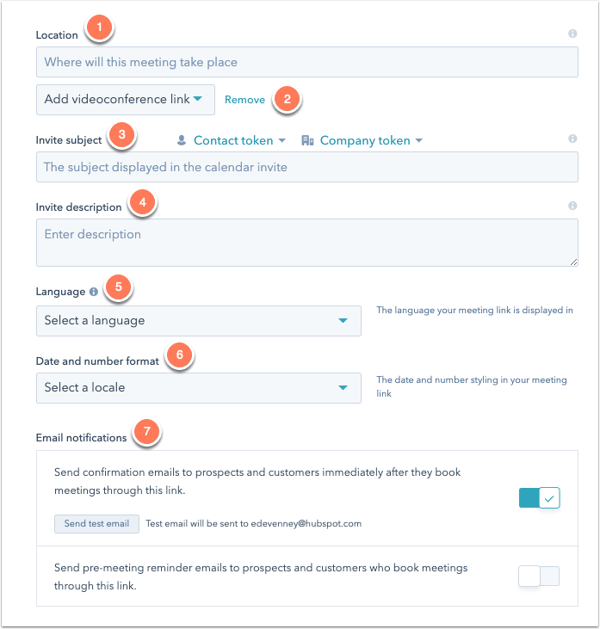
Add a meeting location and customize the invitation that will be sent to attendees.
- Location: include information about how you will connect with your meeting attendee. This can be a call-in link, a physical location, etc. This location will appear in the contact's calendar invite, and the event created on your default personal calendar.
- Add videoconference link: select Zoom from the dropdown to automatically add a link to your Zoom account.
- Invite subject: the calendar invite name, and the name of the event created on your default personal calendar after the meeting is booked (e.g., Product Demo with Lauren). You can insert personalization tokens in the subject by clicking Contact token or Company token.
- Invite description: a description of the meeting that displays when a meeting is booked. This description will appear in the calendar invite your contact receives and the event created on your default personal calendar.
- Language: select a language for your meetings link.
- Date and number format: select a country for your meetings link's date and number styling.
- Email notifications: determine when confirmation emails will be sent to visitors who booked a meeting with you.
- By default, a confirmation email will be sent when someone books a meeting through this meetings link. To disable the confirmation email, click to toggle the Send confirmation emails to prospects and customers immediately after they book meetings through this link switch off.
- To send reminder emails before a meeting, click to toggle the Send pre-meeting reminder emails to prospects and customers who book meetings through this link switch on.
- To select how many weeks, days, hours, or minutes before the meeting that an email should be sent out, enter a number in the text field, then click the Scheduled reminder email dropdown menu and select a time measure.
- You can add up to three reminder emails. To add additional reminder emails, click Add another reminder. To delete a reminder, click the delete trash can icon.
- To include the invite description in the reminder email, select the Include the Invite Description in reminder checkbox.
- To preview the email your contacts will receive, click Preview reminder email. The language of the email will match the language selected in the Language dropdown menu.
- When you're done customizing your meeting's configuration, click Next.
Set your availability
Set the days and times that you will accept bookings for this meetings link.
Please note: your meetings link's available times will appear in the contact's time zone settings. For example, if the contact's computer is set to Pacific time, the times will appear in Pacific time. The contact's calendar settings determine the date and time of the calendar event sent to the contact after booking a meeting.
- Time zone: click the Time zone dropdown menu and select a time zone.
- Available times: use the dropdown menus to set the days of the week and duration of your available time slots. Click + Add hours to add additional time slots.
- When a meeting can be scheduled: enter the number of weeks from now that people can book time on your calendar. If you are creating a meetings link for an event or conference, you can specify a custom date range for booking. Select the Over a period of rolling weeks or Custom date range radio button, then select the number of weeks or use the date picker fields to set your time range. A custom date range cannot be longer than 10 weeks.
-
Minimum notice time: click the dropdown menu to select the minimum amount of time before a meeting that someone can book time with you.
-
Buffer time: click the dropdown menu to select the amount of buffer time between each of your meetings. The buffer time prevents meetings from being booked too closely together. For example, if you have a meeting from 1:00 - 1:30pm and have a buffer time of 30 minutes, the next available meeting time would be 2:00pm.
-
Start time increment: set the frequency of your meeting start times. For example, if you are available between 10:00am and 12:00pm for a 60 minute meeting and your start time increment is 15 minutes, a prospect can book 60 minutes with you at 10:00am, 10:15am, 10:30am, and so on.

- When you're done setting your availability, click Next.
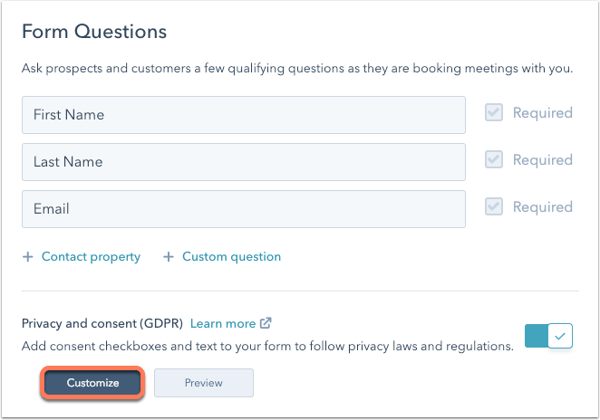
Customize your form questions
By default, First Name, Last Name, and Email are required when someone books a meeting with you. Paid Sales Hub or Service Hub users can also add any contact property as a field or add a custom question.
- Click + Contact property or + Custom question.
- Use the dropdown menu to select a property or enter a question in the field, then click Save.
- To make the field optional, clear the Required checkbox to the right of the field.
- Users with an assigned Sales Hub or Service Hub paid seat can redirect contacts to a specific website page, landing page, or external page after they book a meeting by selecting the Redirect to another page radio button. If you’ve installed ad network pixels, this redirect supports tracking meeting bookings with external networks like Google and Facebook.
- To select a HubSpot page, click the dropdown menu and select a page.
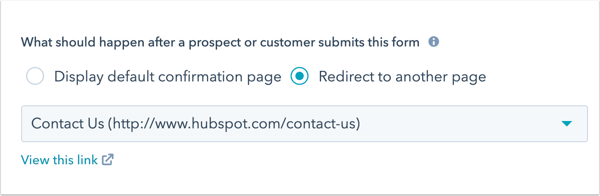
- To redirect to an external page, click Add external link. In the dialog box, enter the URL, then click Add.
- PLEASE do not utilize any external links without consultation with helpdesk@apartmentlife.org
- To select a HubSpot page, click the dropdown menu and select a page.
- If you do not want meetings form fields to pre-populate with known information when a contact returns to your site, click to toggle the Pre-populate fields with known values switch off. Disabling this setting will automatically disable the Auto-submit form when all fields are pre-populated setting.
- To automatically submit the form when the form fields pre-populate with known data, click to toggle the Auto-submit form when all fields are pre-populated switch on.
- Please do not enable Privacy & Consent (GDPR) options -
- Click Save changes.
Users with an assigned Sales Hub or Service Hub paid seat can also customize the company logo, company information, and default colors that display on your meetings link in your account settings. Changes made here will also apply to your documents and quotes. Learn how to edit your company branding for HubSpot's sales tools.
You can edit the meeting link details, configuration, availability, and form questions from the meetings dashboard. To edit the link, hover over the meeting link and click the Actions dropdown menu, then select Edit link.
Share meeting links
Once you've created a meetings link, you can share it with your contacts or embed it on your website.
- In your HubSpot account, navigate to Sales > Meetings.
- Hover over the meetings link and click Copy link.

Share the link with your contacts by adding it as a hyperlink in the body of your email or email signature. If you want to track your meetings link, learn about adding tracking parameters before you share your link. When a contact books a meeting using a meeting link with tracking parameters, the parameter values will populate the contact's Campaign of last booking in meetings tool, Source of last booking in meetings tool, and Medium of last booking in meetings tool properties.
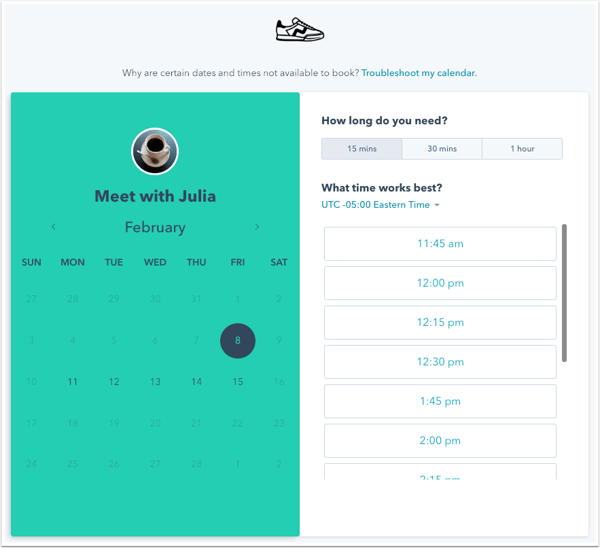
Receive bookings
When a visitor clicks your meetings link, they can select a date, time, and length of time if you've set multiple duration options. They'll then be asked to enter their contact information and answer any custom questions you've added to the meetings link.
Depending on your meeting link settings, the following may occur when a contact books a meeting:
- If a contact has booked a meeting in the past and the Pre-populate fields with known values setting is enabled for the meetings link, HubSpot will recognize the cookie in their browser and pre-populate the form with information from their contact record.
- If the Auto-submit form when all fields are pre-populated setting is enabled, the form will automatically be submitted with the contact's pre-populated information, unless your meetings link includes custom form questions. Custom form questions will not pre-populate because these responses are not saved to a property.
When a meeting is booked, you'll get an email alert with the booking time and the contact's name. You can click to view the contact in the CRM or view the calendar event in your integrated default personal calendar. The prospect will also receive a calendar invitation with all of the meeting details.

Please note: changes to meeting descriptions on the contact record will not be sent to the contact since we are using an Office 365 calendar . You will need to update the meeting description in the calendar event in Outlook to send changes to the contact, not in the contact record.
After the meeting takes place, you can assign a meeting outcome to better track your meeting engagements with your contacts.
- Hover over a meeting engagement and click Edit.
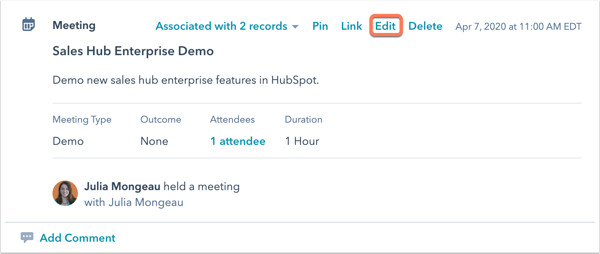
- Click the Outcome dropdown menu and select a meeting outcome.
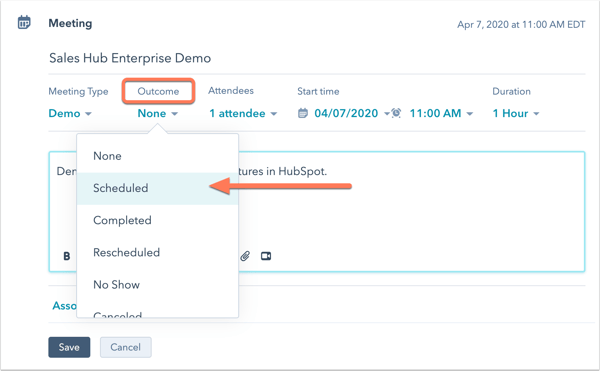
- Click Save.
If you lose access to one of your integrated calendars, contacts will not be able to book meetings with you, even if you have other integrated calendars. You'll receive an email notifying you that someone is trying to book a meeting with you and the calendar that you have lost access to will appear in red on your calendar integrations page.

You can either remove the calendar from your calendar integrations page in your meetings settings by clicking the X beside it, or you can reach out to the person who owns the calendar and ask them to give you access to it again. Once you gain access, revisit this calendar integrations page in your meetings settings and refresh the page.